
How to Roast Poblano Peppers | Step-by-Step Guide
Want to make chiles rellenos? You’re certainly not going to use a green bell pepper, so you need to learn how to roast poblano peppers. In this guide you’ll learn 5 different ways to roast poblano peppers and how to use them in different Mexican foods.
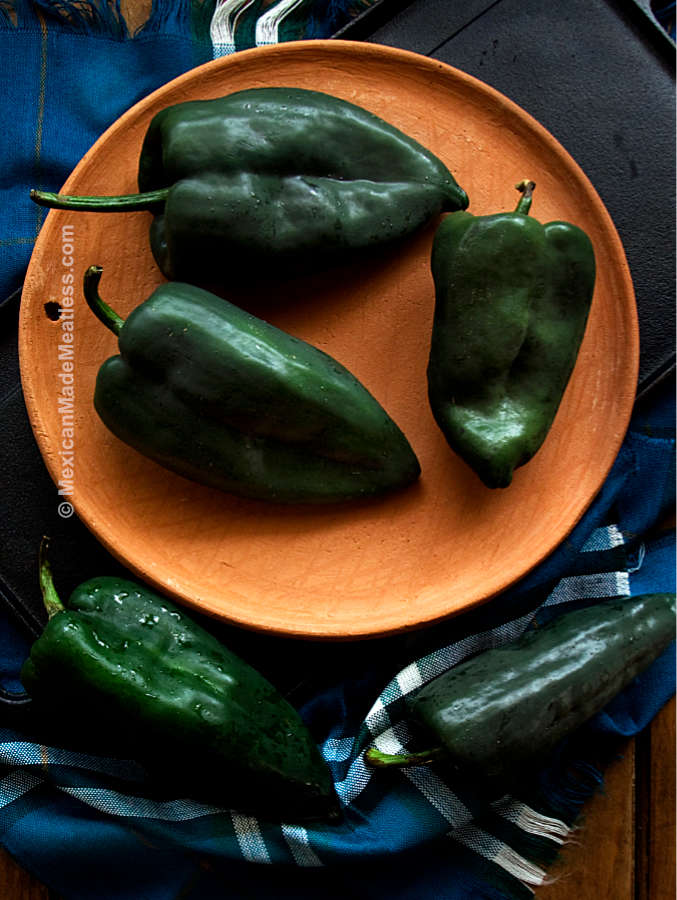
Poblano Peppers
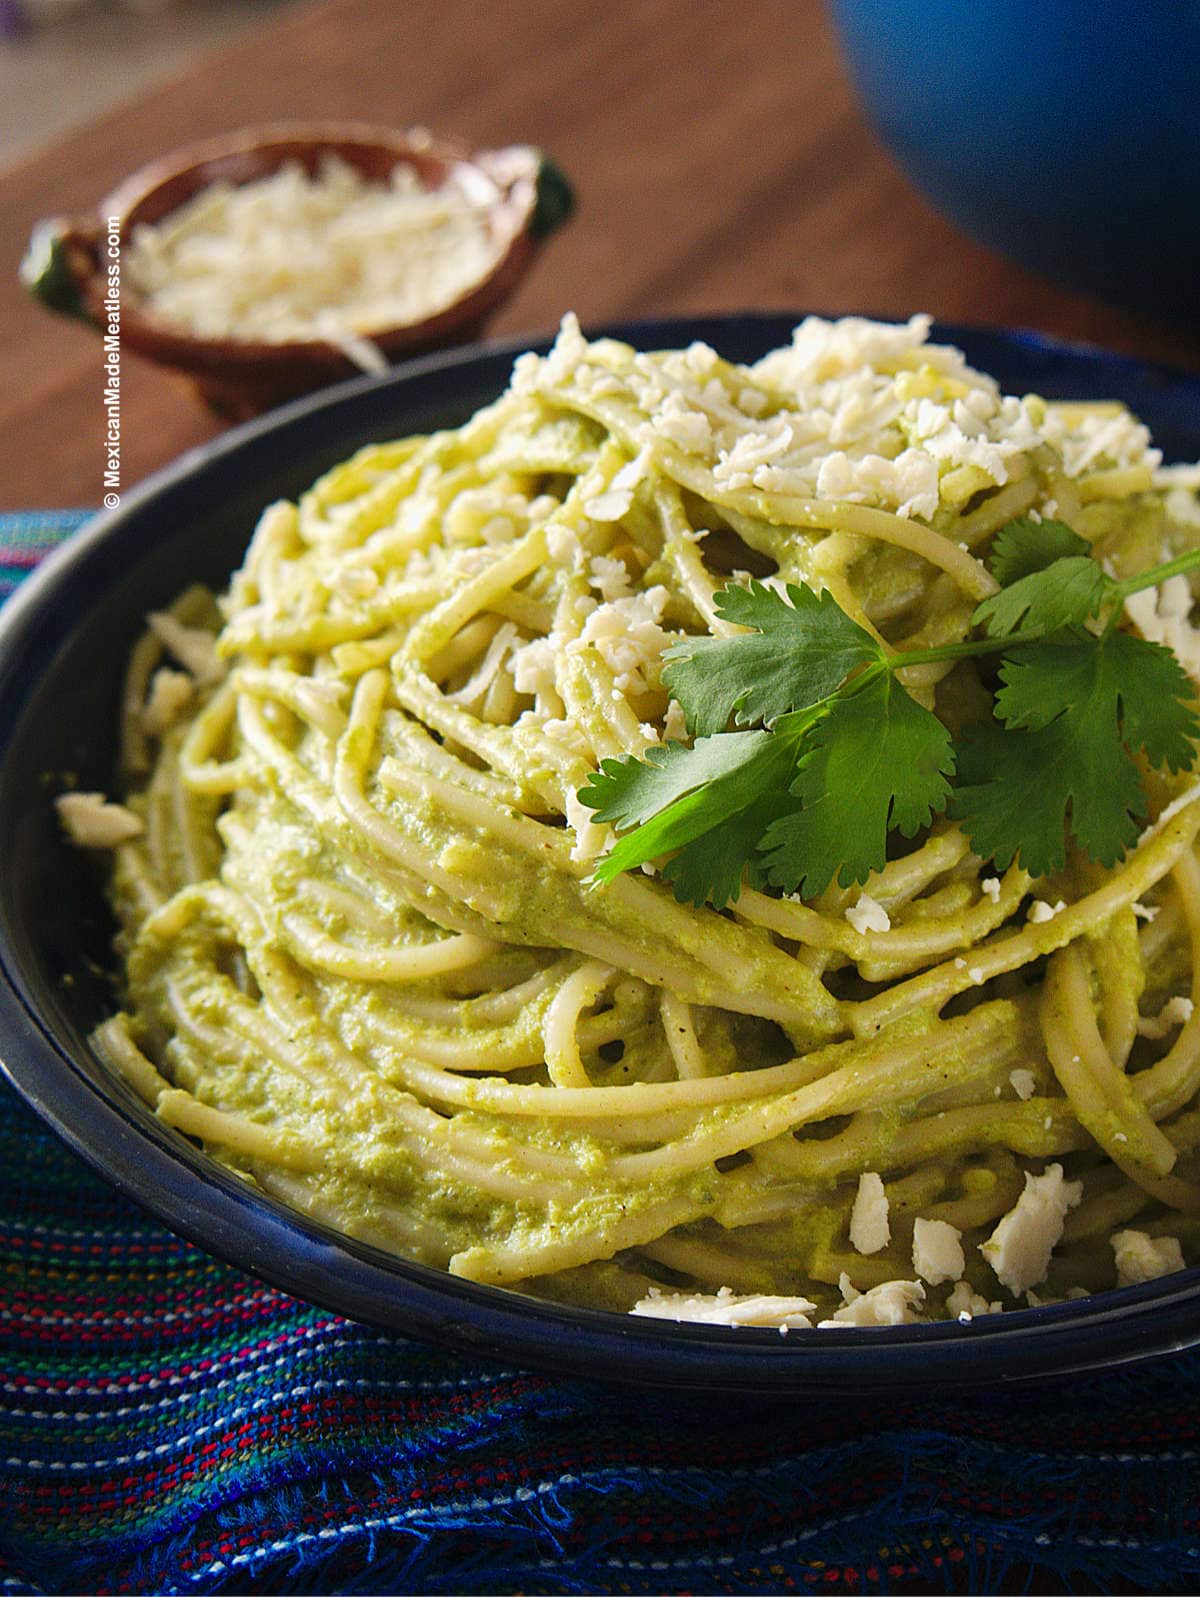
Poblano chiles are a very important ingredient in Mexican cuisine. They are fire roasted, peeled and stuffed and battered and fried, they’re sliced and diced, and blended to make delicious creamy salsas for pasta.
They may be green like some bell peppers, but other than color there are no similarities between the two.
Poblanos are generally a mild chili pepper but once in a while you will come across one that’s suddenly a spicy pepper! So be careful and do read the tips offered below.
Thankfully chile poblano is available at just about all grocery stores. Make sure you choose ones that are firm and have a shinny look and are a vibrant green color.
Why You Should Roast Poblanos
The simplest answer is flavor.
Roasting a poblano over an open flame helps their delicious flavors truly shine. There is no comparison between the taste of this chile pepper fire roasted or raw. By far the fire roasted version is the most robustly flavored one.
When raw, poblanos do have a fantastic scent and taste, but when roasted over an open flame their flavors really come alive.
It’s in this step that the charred skin helps develop that deep rich smoky flavor that gives poblanos that magical taste that no other chile has.
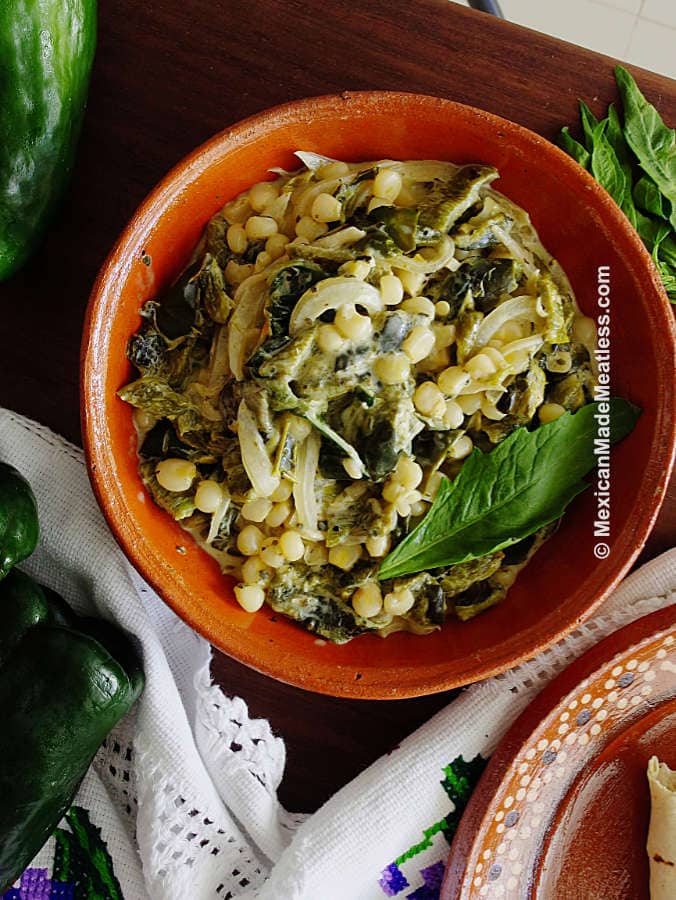
Plus once you have roasted poblanos you can make chile rellenos, rajas con queso, rajas con crema, espagueti verde, tacos, enchiladas and countless other Mexican dishes.
What You Need to Fire Roast Poblano Peppers
You a plate with some plastic wrap or a covered container, or plastic bag like a a large Ziploc-style bag works well. (To be more environment friendly you could use a paper bag, it will get damp though.)
You’ll need some tongs, a cutting board, disposable gloves to prevent chili burns.
Of course you also need the whole peppers!
How to Roast Poblanos on a Gas Stove or Open Flame
If you love the authentic and traditional flavors of Mexican cuisine then you simply must learn how to prepare poblano peppers correctly — trust me the work really pays off.
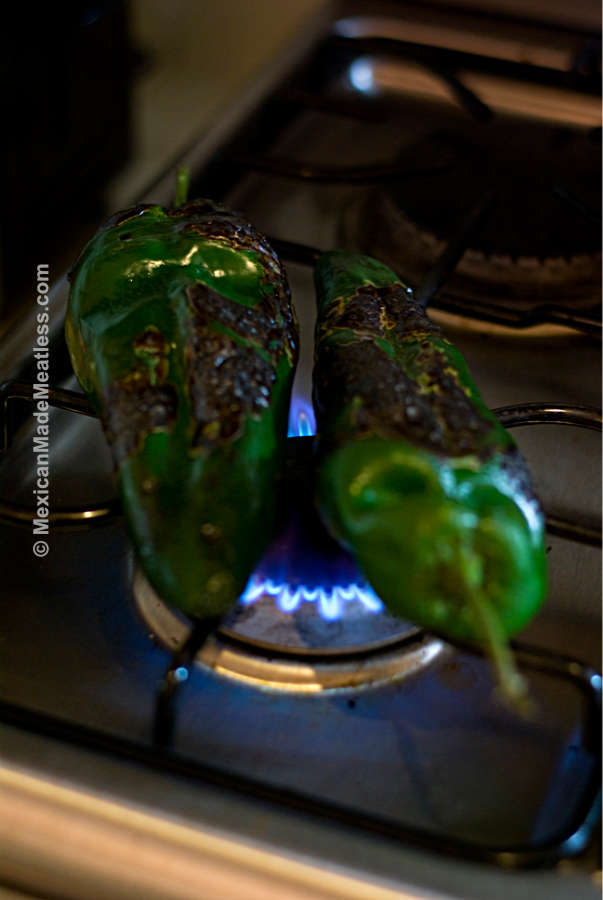
The traditional roasting process for poblanos is on the gas stove top and over an open flame, also sometimes called fire roasted.
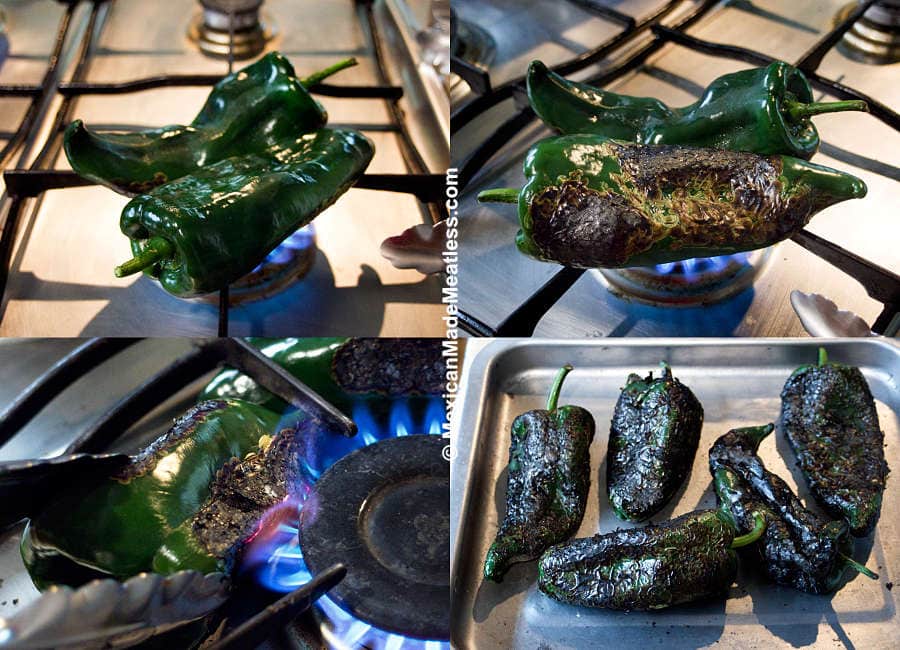
Step #1: Lay Directly on The Gas Burner
Turn your stove on to a flame of medium heat, carefully place two to three whole poblano peppers directly onto the gas stove burner and over the flame.
You’ll want to use tongs to help arrange the peppers so that they don’t fall off and to help ensure even heat/flame on each one.
Slowly the peppers will get little blisters that will darken and make a little popping sound. Use the tongs to keep turning them so that the entire pepper is evenly charred on all sides.
Do not leave them unattended because you want the other skin just to darken like in the pictures and not burn entirely and turn to ash.
This step takes the longest and will require your patience. Continue turning each chile until it’s blacked all around. Then remove from the flame.
You’ll also notice that the chili’s flesh will feel soft, you want to make sure that it feels this way throughout. You don’t want soft in one spot and hard and crunchy in another.
Continue fire roasting the poblanos until all have been roasted.
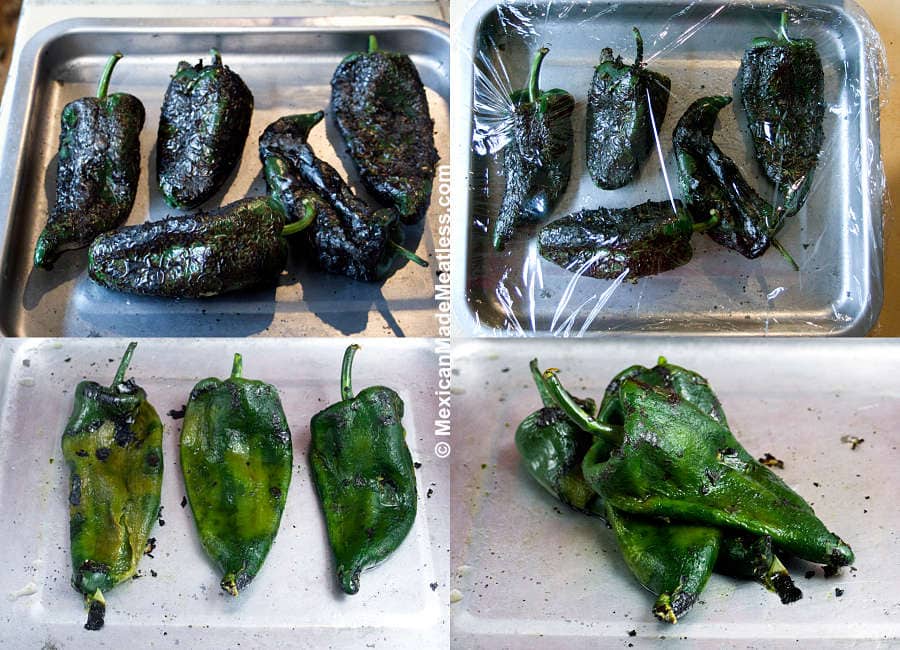
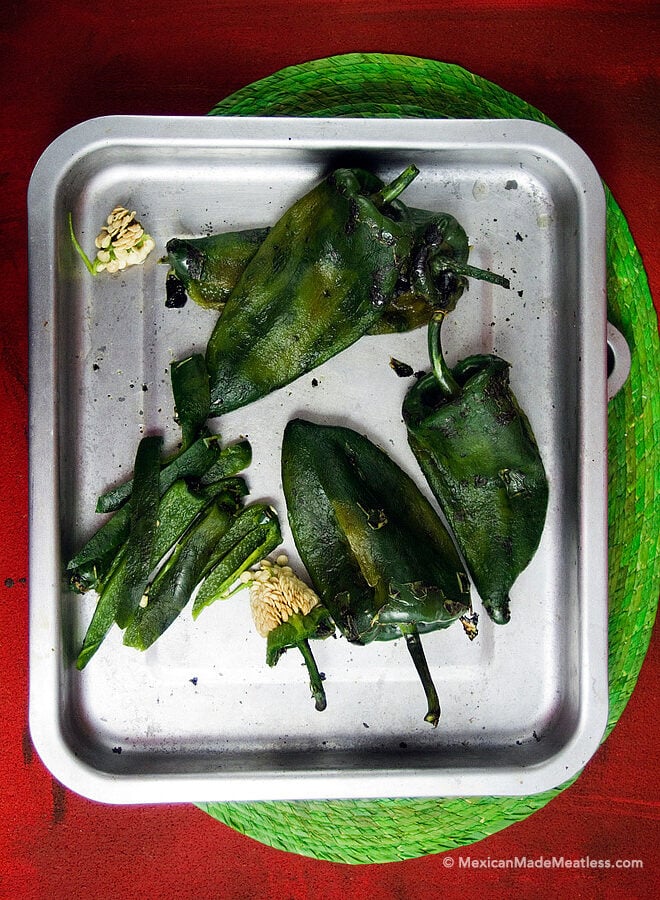
Step #2: Sweating The Peppers
After you have charred (or roasted) all of the peppers place them on the plate and cover with plastic wrap or put them in a container with a lid, or put them inside of a plastic bag and seal.
Let them sit for 8 to 10 minutes. Whilst they are inside any of these sealed containers they begin to release their heat as well as some natural liquid, this is what we call “sweating the chiles”.
The purpose of this step is so that all of those little bits of charred skin will easily peel away from the pepper.
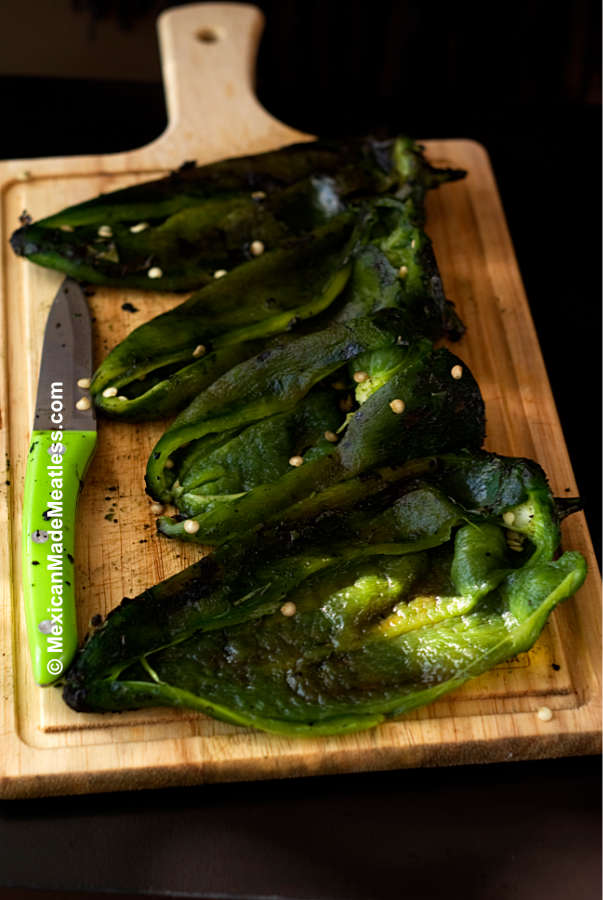
Step #3: How to Peel Poblano Peppers
I often get asked if it’s necessary to peel roasted poblano peppers. Yes it is, poblanos have a tough outer skin and it’s a crucial step for flavor and texture.
Once roasted the poblano’s skin separates from the chile flesh and it becomes thicker. Though it’s perfectly safe (and edible) to consume, the texture can be a bit unpleasant. It’s quite thick. So the best thing is to discard it. This is specially helpful when making salsas or sauces.
Wear Gloves
Though poblanos tend to be a mild pepper occasionally you’ll come across some that pack quite the heat. So if you want to be safe put on a pair of latex gloves or kitchen gloves to prevent chile burns.
Some people will also rub a little bit of olive oil or vegetable oil on their fingers before handling the peppers. Something about the oil making a barrier to stop the heat.
For this step you’ll need a cutting board or a baking sheet, a butter knife, and a little bit of warm water.
To peel place poblano pepper on a cutting board or plate and use the back of the knife to gently scrape away the charred skin.
Alternatively, you can use your hand to hold the pepper and with your other hand use your fingers to carefully pull away the charred skin.
Either way works great, pick which ever is easiest for you.
When using the butter knife or your hands you can dip in a little bit of water to help remove any of the built up charred bits on the knife and your fingers.
Lastly, use a paper towel to remove any of the excess charred bits from the peppers.
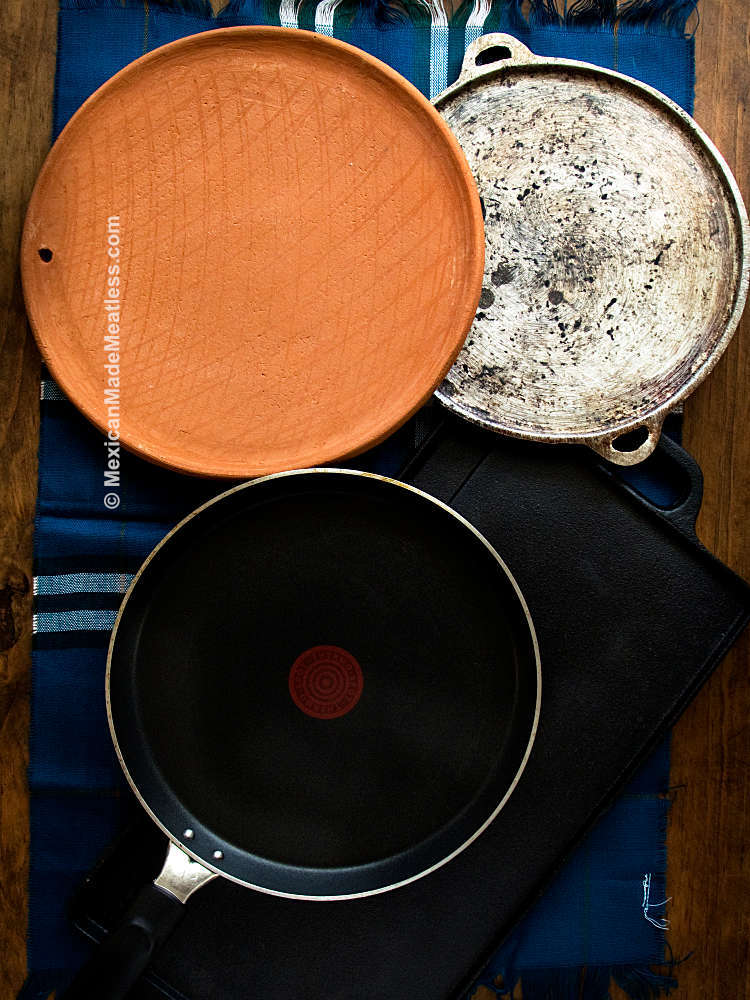
Using a Comal on an Electric Stove Top
To roast on an electric stove, you can use a frying pan or a comal, or griddle. Simply heat it up over high heat and once hot place the poblanos on there.
Turn the over to make sure the whole pepper has been blackened. Keep turning to get the side of the peppers too.
This step is my least favorite because it seems to take the longest. Also if the peppers aren’t flat, it’s going to be more difficult to the curves roasted.
The Broiler Method
This method is much quicker than the roasting over an open flame. However, the taste isn’t the same, or nearly as delicious as over an open flame.
To use the broiler method, set oven to broil and have a baking sheet ready.
Clean the peppers just as instructed above then lay on a baking sheet. Using a small pairing knife make a small incision on each poblano pepper. Then place the baking sheet under the broiler for 5 minutes then flip over and continue to broil another 5 or so minutes. You want the peppers to blacken and soften up. Remove from the oven and allow to cool before handling.
You could also roast in the normal oven setting or even in a toaster oven. Just place the poblanos on a sheet pan and set the timer.
Roasting Poblano Peppers in an Air Fryer
Much like the broiler method, the air fryer method is quick but the depth of flavors isn’t as much as fire roasted. Even so, I still use this method simply out of convenience.
To air fry poblano peppers thoroughly clean and pat dry. Cut off a good chunk off long stems — you want to make sure the peppers fit in the air fryer.
Place as many poblano peppers into your air fryer’s basket without overcrowding. My air fryer model is large so I can usually fit 4 to 5 medium-large peppers.
Set the temperature to 390F and the timer to 8 minutes. Once the timer goes off carefully open the air fryer and flip over the poblanos. Set the timer for 6 to 8 minutes. The additional time required will depend the size of your poblanos.
Air fry just until they are soft and have some blackened spots.
Roasted Poblanos on The Grill
Whenever you are having a cook out make sure to place some poblanos on the grill. They’ll roast up quickly and have a delicious flavor.
Follow the same steps above for sweating, peeling and prepping.
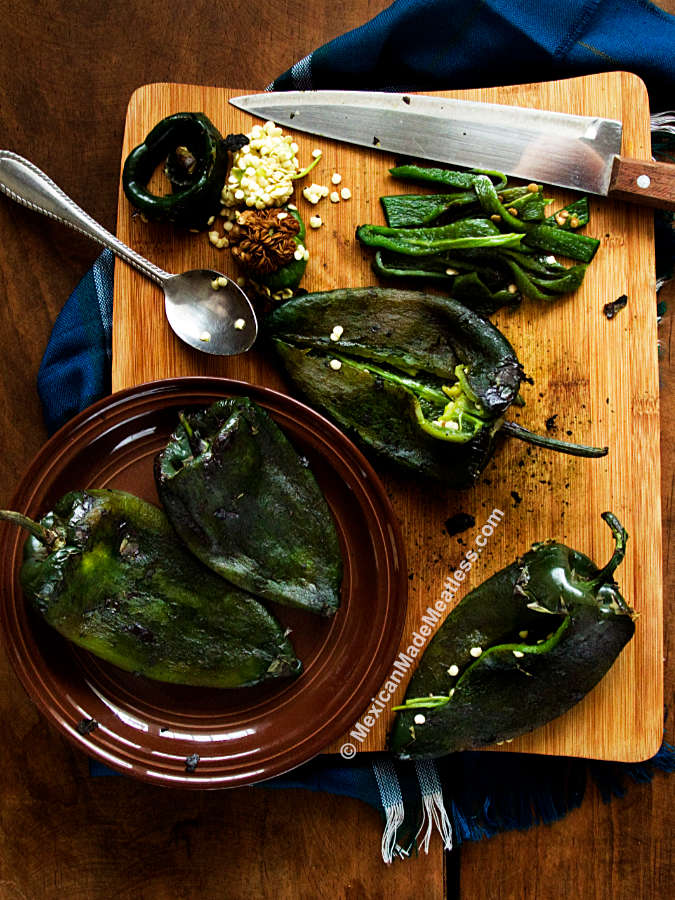
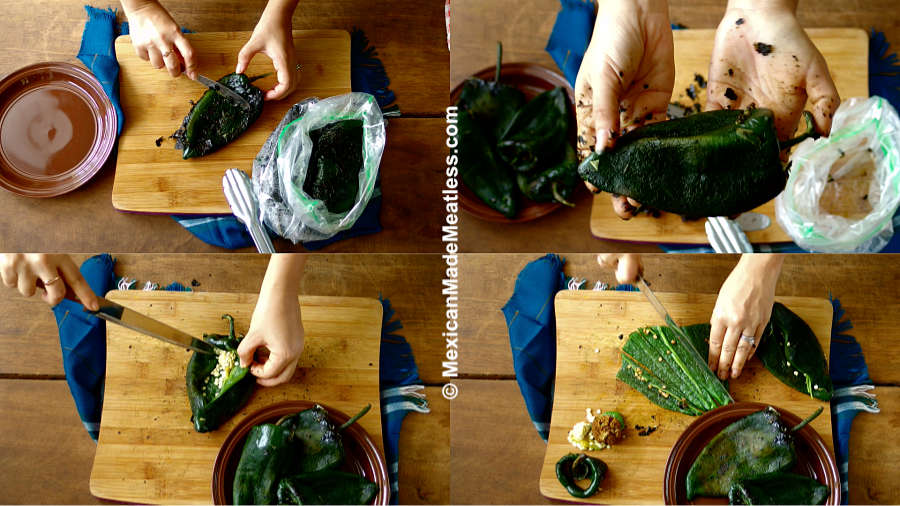
How to Prepare and Use Roasted Poblano Peppers
Once you have fire roasted and peeled the chiles you can prep them to use in all of your favorite Mexican recipes.
For Chiles Rellenos
If you are going to be stuffing the roasted poblanos simply use a knife to make an incision going lengthwise or top to bottom.
Very carefully (you may want to use those latex gloves again) use a small knife to cut away the seeds from inside the chile. You can also use a spoon to help scoop out the seeds and discard.
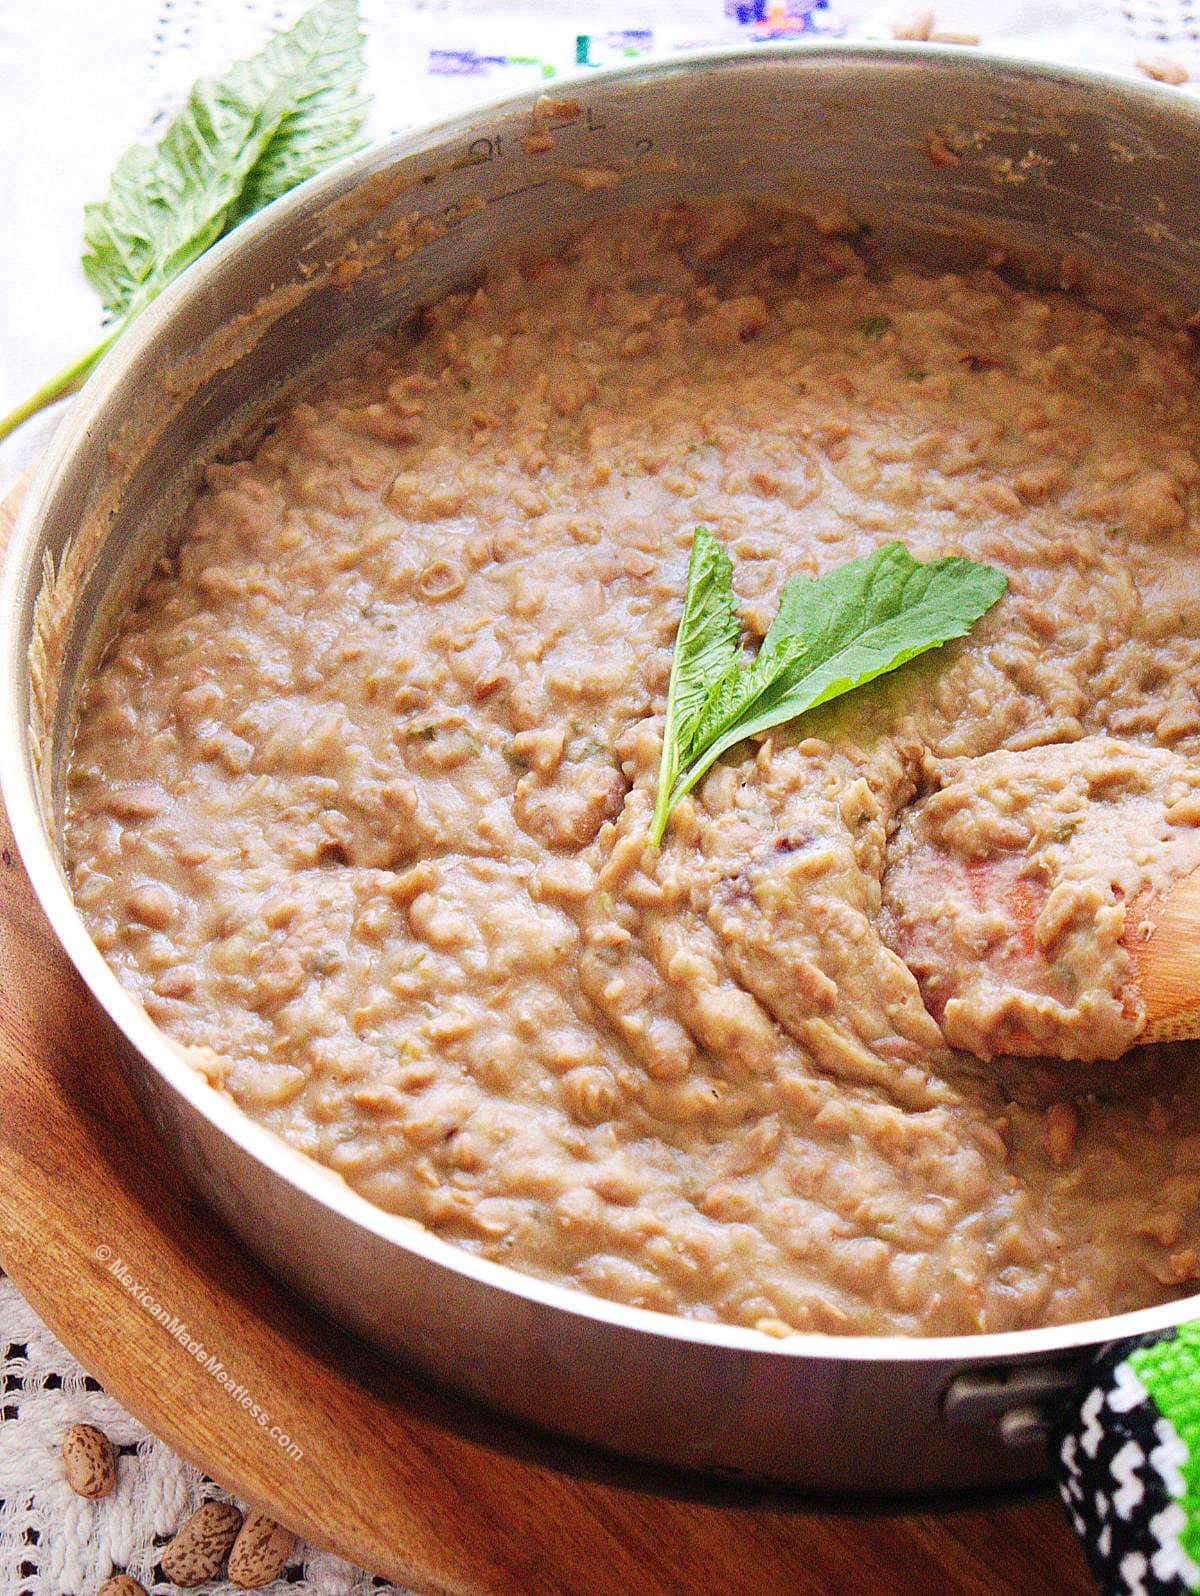
That’s it! Now you can stuffed with cheese, beans, veggies or anything else you want to use.
For Fajitas or Rajas
Grab one charred pepper cut it lengthwise and in half, use the knife to cut away the seeds, stems and any attached membranes. Then slice the halves into long strips cutting either along the width or length of each half.
For Salsas, Sauces, and Burgers or Meatballs
Remove the stems and seeds as previously indicated. The chop into desired sizes.
That’s it, you are now ready to stuff or sauté those strips and enjoy all of that hard work — it really isn’t difficult at all. Once you go through the process of roasting them, you’ll see that each and every step is absolutely worth it and you’ll never want to skip this method again.
How to Store Roasted Peppers
You can store them in the refrigerator for about 5 days before they go bad.
If you have extra charred peppers, or want to same yourself some time on your next meal, then you can freeze them. Both whole or in strips, once roasted and frozen they keep quite well in the freezer. I wouldn’t do more than 12 months. Store in freezer-safe container or heavy freezer bag.
How to Roast Poblano Peppers | Step-by-Step Guide
Video
Ingredients
Ingredients:
- 8 whole poblano peppers
Kitchen Utensils:
- gas stove
- metal tongs
- plate
- plastic wrap or a container with a lid or a plastic sandwich bag
- knife
- latex gloves highly recommended for preventing chile burns
Instructions
- Throughly rinse each pepper to make sure to remove any dirt, use a paper towel or clean kitchen towel to pat dry each pepper.

- Turn your stove on to a medium-high flame, carefully place two or three peppers directly on the burner and over the flame. You’ll want to use the tongs to help arrange the peppers so that they don’t fall off and to help ensure even heat/flame on each one. Slowly the Poblanos will get little blisters that will darken and make a little popping sound. You’ll have to use the tongs to keep turning them so that the entire pepper is evenly charred on all sides. Do not leave them unattended because you want the other skin just to darken like in the pictures and not burn entirely and turn to ash.

- Once blackened on all sides, remove from the flame and continue the same step until each pepper has been roasted on the flame. You’ll also notice that the chile’s flesh will feel soft, you want to make sure that it feels this way throughout.
- After you have roasted all of the peppers, place on a plate and cover with plastic wrap or put them in a container with a lid, or put them inside of a plastic sandwich bag and seal. Now leave the chiles aside for about 10 minutes. Whilst they are inside any of these sealed containers they begin to release their heat as well as some natural liquid, this is what we call “sweating the chiles”. The purpose of this step is so that all of those little bits of charred skin will easily peel away from the pepper.
- Next you can place a “sweated” chile on a cutting board or plate and use a knife to gently scrape away the charred skin. Alternatively, you can use your hands to hold the pepper and with your other hand use your fingers to carefully pull away the charred skin. Either way works great, pick which ever is easiest for you.
- Use a paper towel or a little water to remove any of the excess charred bits from the peppers.
How To Devein And Prep Roasted Poblano Peppers
- Rellenos or Stuffed: If you are going to be stuffing the peppers simply use a knife to make an incision going lengthwise. Very carefully (you may want to use those latex gloves again) use a small knife to cut away the seeds from inside the chile. Ready for stuffing!

- Fajitas or Rajas: Grab one charred pepper cut it lengthwise and in half, use the knife to cut away the seeds, stems and any attached membranes. Then slice the halves into long strips cutting either along the width or length of each half.
- Salsas, Sauces, Burgers and Meatballs: Remove the stems and seeds as previously indicated. The chop into desired sizes.
- Now Your Roasted Poblano Peppers Are Ready To Cook As Desired!

Notes
Nutrition
HELP US RATE THIS RECIPE
Please make sure to leave a comment and a star rating if you make the recipe, it’s a huge help for my blog. Gracias!
Roasted Poblano Pepper Tips
- Poblanos that are nearly flat are much easier and quicker to roast over an open flame. When Poblanos are curvier you may have to hold them directly over the flame with the tongs in order to get into all of the little nooks and crannies.
- Some people like clean the peppers under running water. But there’s many traditional cooks that say that dipping the peppers in the water takes away some of their natural flavors and oils.
- Generally speaking the peppers roasted under the broiler and air fryer the skin may be easier to lift and pull away. The fire roasting method is better with the knife or hand.
- You can use this method for other chili peppers too. They all work the same with any fresh Mexican chile pepper or even red bell peppers are amazing this way.
- Fun fact, did you know when dried poblanos are called ancho chiles?
Try These Poblano Pepper Recipes
Now that you know how to properly prepare poblano peppers for Mexican cooking, below are some delectable recipes to try.
- Mexican Green Spaghetti Recipe (Espagueti Verde)
- Rajas con Crema or Poblano Pepper in Cream Sauce
- Enchiladas Verdes with Roasted Poblano Pepper & Oaxaca Cheese
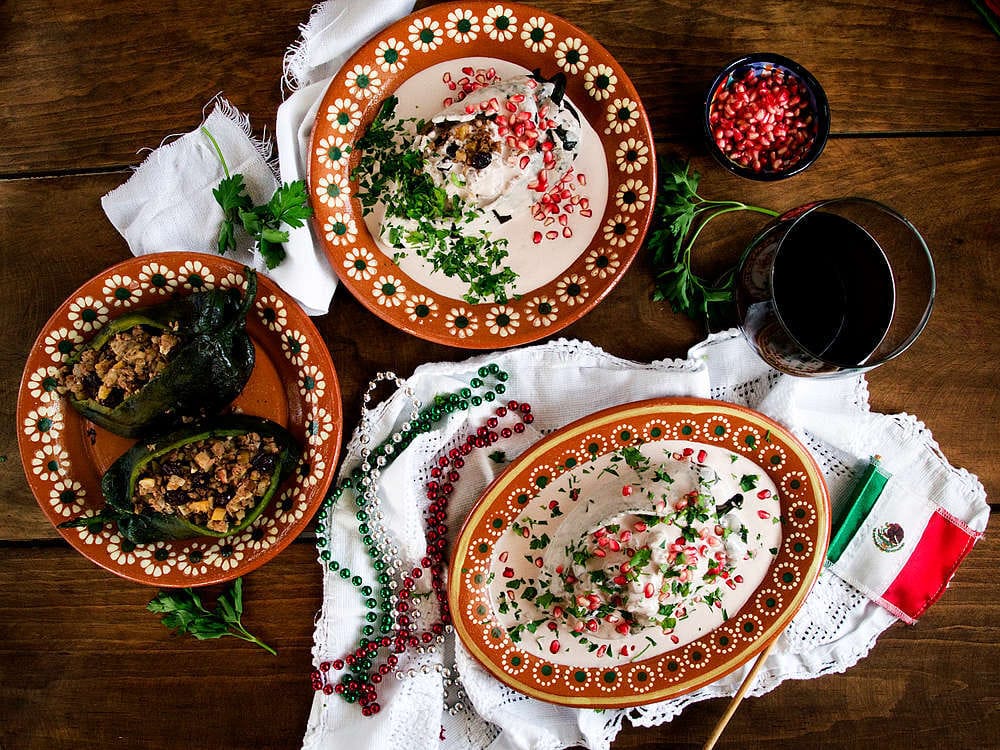
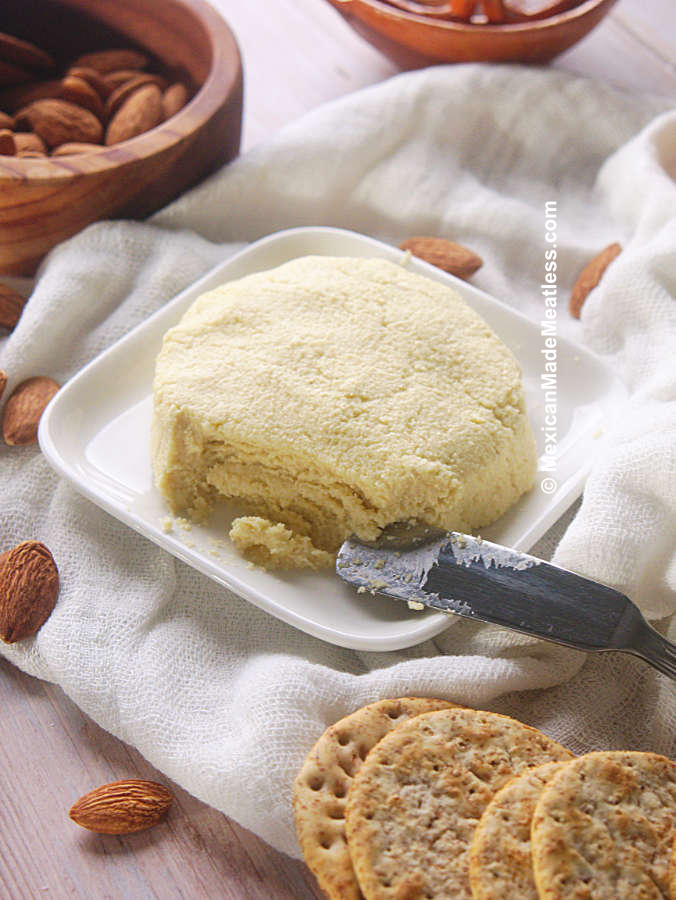
- Vegetarian Chiles en Nogada (Poblano Peppers in Walnut Sauce) (no ground beef in these)
- Corn and Poblano Pepper Soup with a Touch of Curry Powder
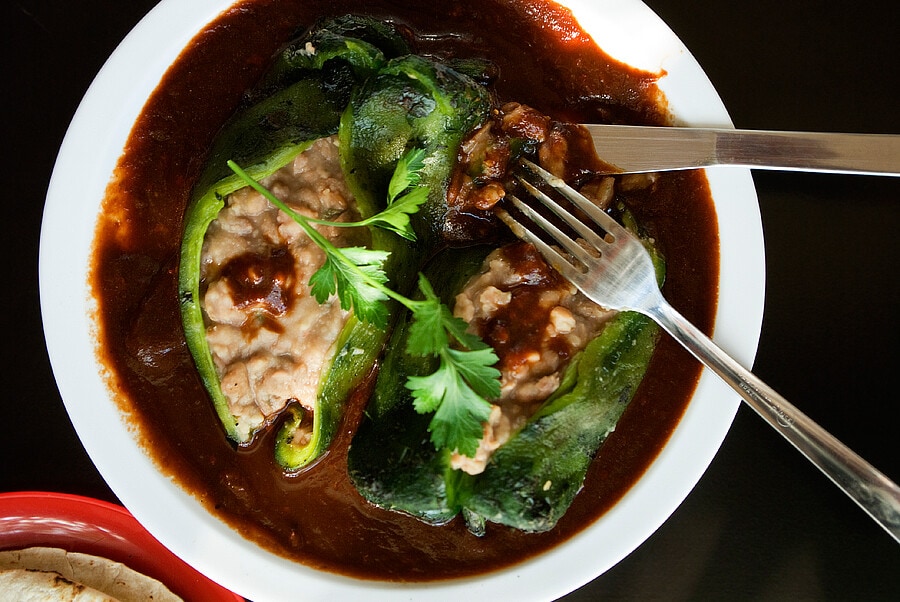
- Bean Stuffed Poblano Peppers with Ancho-Guajillo Chile Sauce
- How to Make Vegetarian Chiles Rellenos
- Easy Vegan Fajitas Recipe Video | For When You Don’t Feel Like Cooking
Nancy Lopez is a food blogger and author of the cookbook Mexican Tamales Made Meatless. Born in Mexico, raised in the US, and currently living in Southern Mexico, she has followed a meatless diet for almost 10 years. It is her passion and mission to share all she has learned about vegan Mexican cooking and vegetarian Mexican recipes. Mexican Made Meatless is a blog dedicated to preserving the authentic flavors of Mexican cuisine just without the meat. It’s a place to celebrate Mexican culture and all it’s delightfully delicious traditional foods. Read more…
What an excellent tutorial, Nancy. I’ve bookmarked this for future reference! Even though I’m pretty familiar with the process (Italians roast peppers in much the same way) I still learned a lot. Interesting that you endorse rinsing with water—it makes life so much easier, but I always felt “guilty” because so many sources tell you not to…
Thank you so much Frank, I really appreciate it. I don’t always do the rinsing in water, but when I do it is for the larger peppers that just have so much charred or extra skin on them. Maybe if I noticed a huge difference in flavours I wouldn’t do it, but I haven’t so far. I really don’t think there is a reason to feel guilty because after all we do want to make the cooking process easier on ourselves, right? 🙂
Yup, gotta roast your chilies on an open flame! I use a grill — that way I can do a whole batch at once (and freeze what I’m not going to use right away. Fun post — thanks.
That’s awesome, John and glad to hear it. I need to do mine on the grill too because sometimes the open flame just takes too long. 🙂
WOW, This is the tutorial that I didn’t know I needed in my life. All these different ways of roasting a poblano, I would’ve never thought about using the air fryer. and definitely didn’t know you can freeze them. All the recipe ideas too. love love this
Thank you, Marcella! I’m thrilled you found it so useful.
It’s not my first time to pay a visit this web site, i am
browsing this web page dailly and obtain fastidious facts from
here everyday.
Here is my homepage :: Jordan
I’d like to find out more? I’d care to find out more details.
Absolutely so yummy!!.. mmhhh!!.. and unfortunately I was mistaken on how to roast them. Excellent tutorial.
Thank you Albert, so happy you found this helpful.